We will get in touch soon
You will receive a copy of your message in your e-mail.
You will receive a copy of your message in your e-mail.
Advances in virtualization technology now make it possible to use UX design sprints to quickly prototype ideas without wasting time or money in the development process. Design sprints are where the agile manifesto and movement meet design thinking. They turn the design thinking framework into an agile iteration process that enables businesses to prototype the design of a whole digital product step by step.
The beauty of this, and where significant money can be saved in development, is that because testing is part of the design thinking process, every new idea is tested with users before the whole package is handed over to engineering. So, if an idea is not worth pursuing, you know it right then and there and can avoid the expenditure associated with creating features and products that never make it to market. For this reason, UX design sprints can help companies significantly reduce overall product development costs.
How UX Design Sprints Work
The process is designed to work for digital products by using platforms that create connections between screens. To illustrate how such a sprint might work, we can use the example of providing a service similar to Uber. The underlying idea for the design sprint in this case would be the idea of car sharing: working with partners that have cars and people that need to move from point A to point B.
In such a case, our approach would be to divide that idea into small features. For instance, asking for a ride. Then, we would prototype or define the user journey of that feature. We would ask: “What are the steps that the user needs to follow in order to complete the goal?” To determine this, we would do mockups that create screens in the prototyping software, such as Figma or Adobe XD.
The process allows users to test out features before any lines of code are generated to create them. Test users could click on the prototype of the feature, and it will show them different screens. If we created animation for the feature, it will animate the screen. It’s called the “Wizard of Oz” experience. It makes it appear like you’re using the real product and that allows us to gather insight and ask questions and see what the user is doing, enabling us to perfect the flow or product—or to demonstrate that the product or idea or feature is not worth pursuing.
The platform we use can be downloaded or accessed through a browser. It allows users to create connected screens — almost like a super PowerPoint function. We create the skeleton of the screens, and we connect them to validate the user flow or the user journey. It’s all about trying to take the idea outside of someone’s mind and into something that everyone can see and test.
The process is interactive—you can go through the specific flow that we design as if you were using an application naturally. This is not just for websites, it’s also for products. For instance, digital products such as mobile applications like Uber or Pinterest, Facebook, Instagram, etc., or web platforms like Amazon, Etsy or any website that a user interacts with and obtains value from.
By testing the functionality of sites in a virtual environment, the client can see how users interact with their products in concept and understand if their need is something that is out there in the market already and if it’s worth pursuing—if more money should be invested in developing and creating the actual product. Overall, this type of UX design sprint enables you to quickly prototype these ideas while minimizing the time and money you spend on the process.
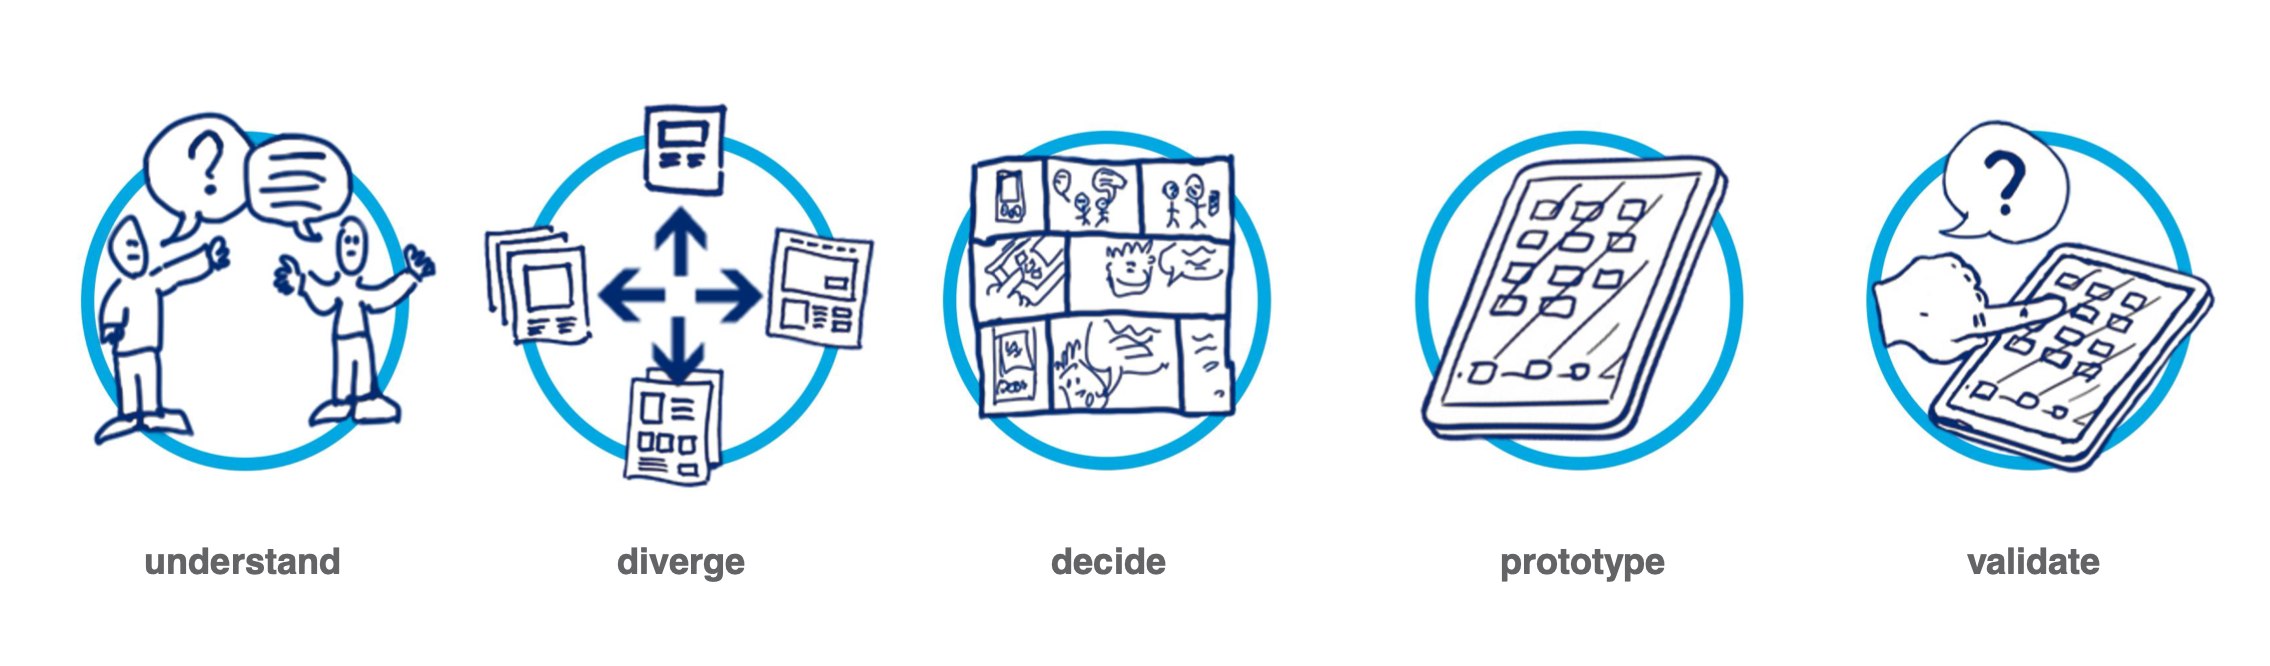
The Five Steps of the UX Design Sprint Process
The following is an overview of the five steps of the process using the design thinking framework:
1. Understand the user: We interview the client to understand what types of users are being targeted. What is the niche of users that they imagine will be using the product?
In the case of a product similar to Uber, for example, the target niche could be people that don’t have a car, and don’t want to wait for a taxi or take any public transportation, and want to move from point A to point B. That will be user one. User two is someone who has a car and doesn’t have much to do with it besides driving it and wants to make some money out of it. For instance, someone that doesn’t have a job and has a car loan and needs to make payments. With that analysis, we understand their profile, their needs, their problems and what they’re going to be using the product for, and how they would like to use the product.
Once we create this user persona, that is the actual deliverable and the artifact that we build in that step. We use that to try to think like that person. Then we move to step two.
2. Brainstorm: We have a persona or personas in mind for the product and, working with the client, we come up with ideas about how to solve their problems / address their needs. We toss out ideas for consideration, we document them and then we move to step three.
3. Evaluate options: Now that we have, let’s say 5 or 10 or so ideas of how this product or flow is going to work, let’s go through each one of them and investigate them. We run a bit further with them and try to validate which are best, which are the most feasible based on the client’s criteria, and we then pick one or two to move forward with.
4. Prototype: After we pick the best ideas to work on, we move to step four, which is where we create the screens. We have two steps for this process. The first is wire framing, which is creating the skeleton of the flow of the screens. To do this, we ask the following questions:
· How many screens are there going to be?
· How are they going to be structured?
· Where is this button going to go?
· Do we show a map where people should go (and other similar questions)?
After that, we go through visual design, where we say, “Now that we have this skeleton and we have this structure of each screen, let’s make it beautiful; let’s make it engaging; let’s enhance the experience that we’ve created.” With that step, we create the whole interactive prototype that we will test in step five.
5. Testing: Now that we have the archetype of the type of users that we want, we go to the market, and we recruit those users. In step five, we show what we built in step four, the interactive prototype, to those users and watch them use the product. We give them a goal for the feature.
In the case of a rideshare app, for example, we are creating the app for a ride flow. We tell them: “You are in the theater and now you’re going to go home. It’s late at night and you have this product where the promise is that they can find a ride for you to get home.” We have them use the product and we watch them use it. For example, ordering a ride. We can watch them interact with the whole pattern from the flow or we can learn from their interaction and their behavior. We analyze that information, and we tweak the design if the user, for example, got lost, or if they didn’t know where to click, or if the structure was confusing. If they say that they will never use this, we ask them why and we try to tweak the design in order to address the concerns they had.
After all five of these steps have been validated, we have this feature or this flow ready to go. Then, if the client wants to build it, we hand it over to development and start the process all over for a new feature.
Advantages of the UX Design Sprint Process
Aside from the significant efficiencies realized by receiving key feedback before any software development begins, this approach has other significant advantages over the traditional design process. For instance, if your product has five features, using the traditional method, you have to create the five features, create all the flows, all the screens, and all the documentation before you show it to the user. So, if you have five features already designed and you show it to the user only to find that they don’t like the product, it will take longer to fix and cost more than if you had tested these features one by one.
In this traditional “waterfall” approach, the design firm designs all five of those features and then gets them to the client all at once as opposed to being able to show them feature by feature. With virtual prototyping using UX design sprints, you can do this in real time, so you’re not going back and forth with completed designs with all the extra time and expense that involves.
The waterfall approach can be costly because if you design five features and, for example, it turns out that the user will never use feature three, that feature has already been completely designed. This results in lost work and lost resources. By using the agile approach with design sprints, you can figure out if feature three is not going to be used early in the process when users are interviewed, so feature three is never created.
The use of UX design sprints to save time and money in the development process is increasing as more and more companies become aware of the benefits the technique enables. As virtualization technology improves, the efficiencies offered by the approach are likely to increase as well.
We would love to discuss further if you have specific questions or have a design initiative that could benefit from this approach. Please reach out and let us know!